Thursday 29 September 2022

Cooling System - Radiator

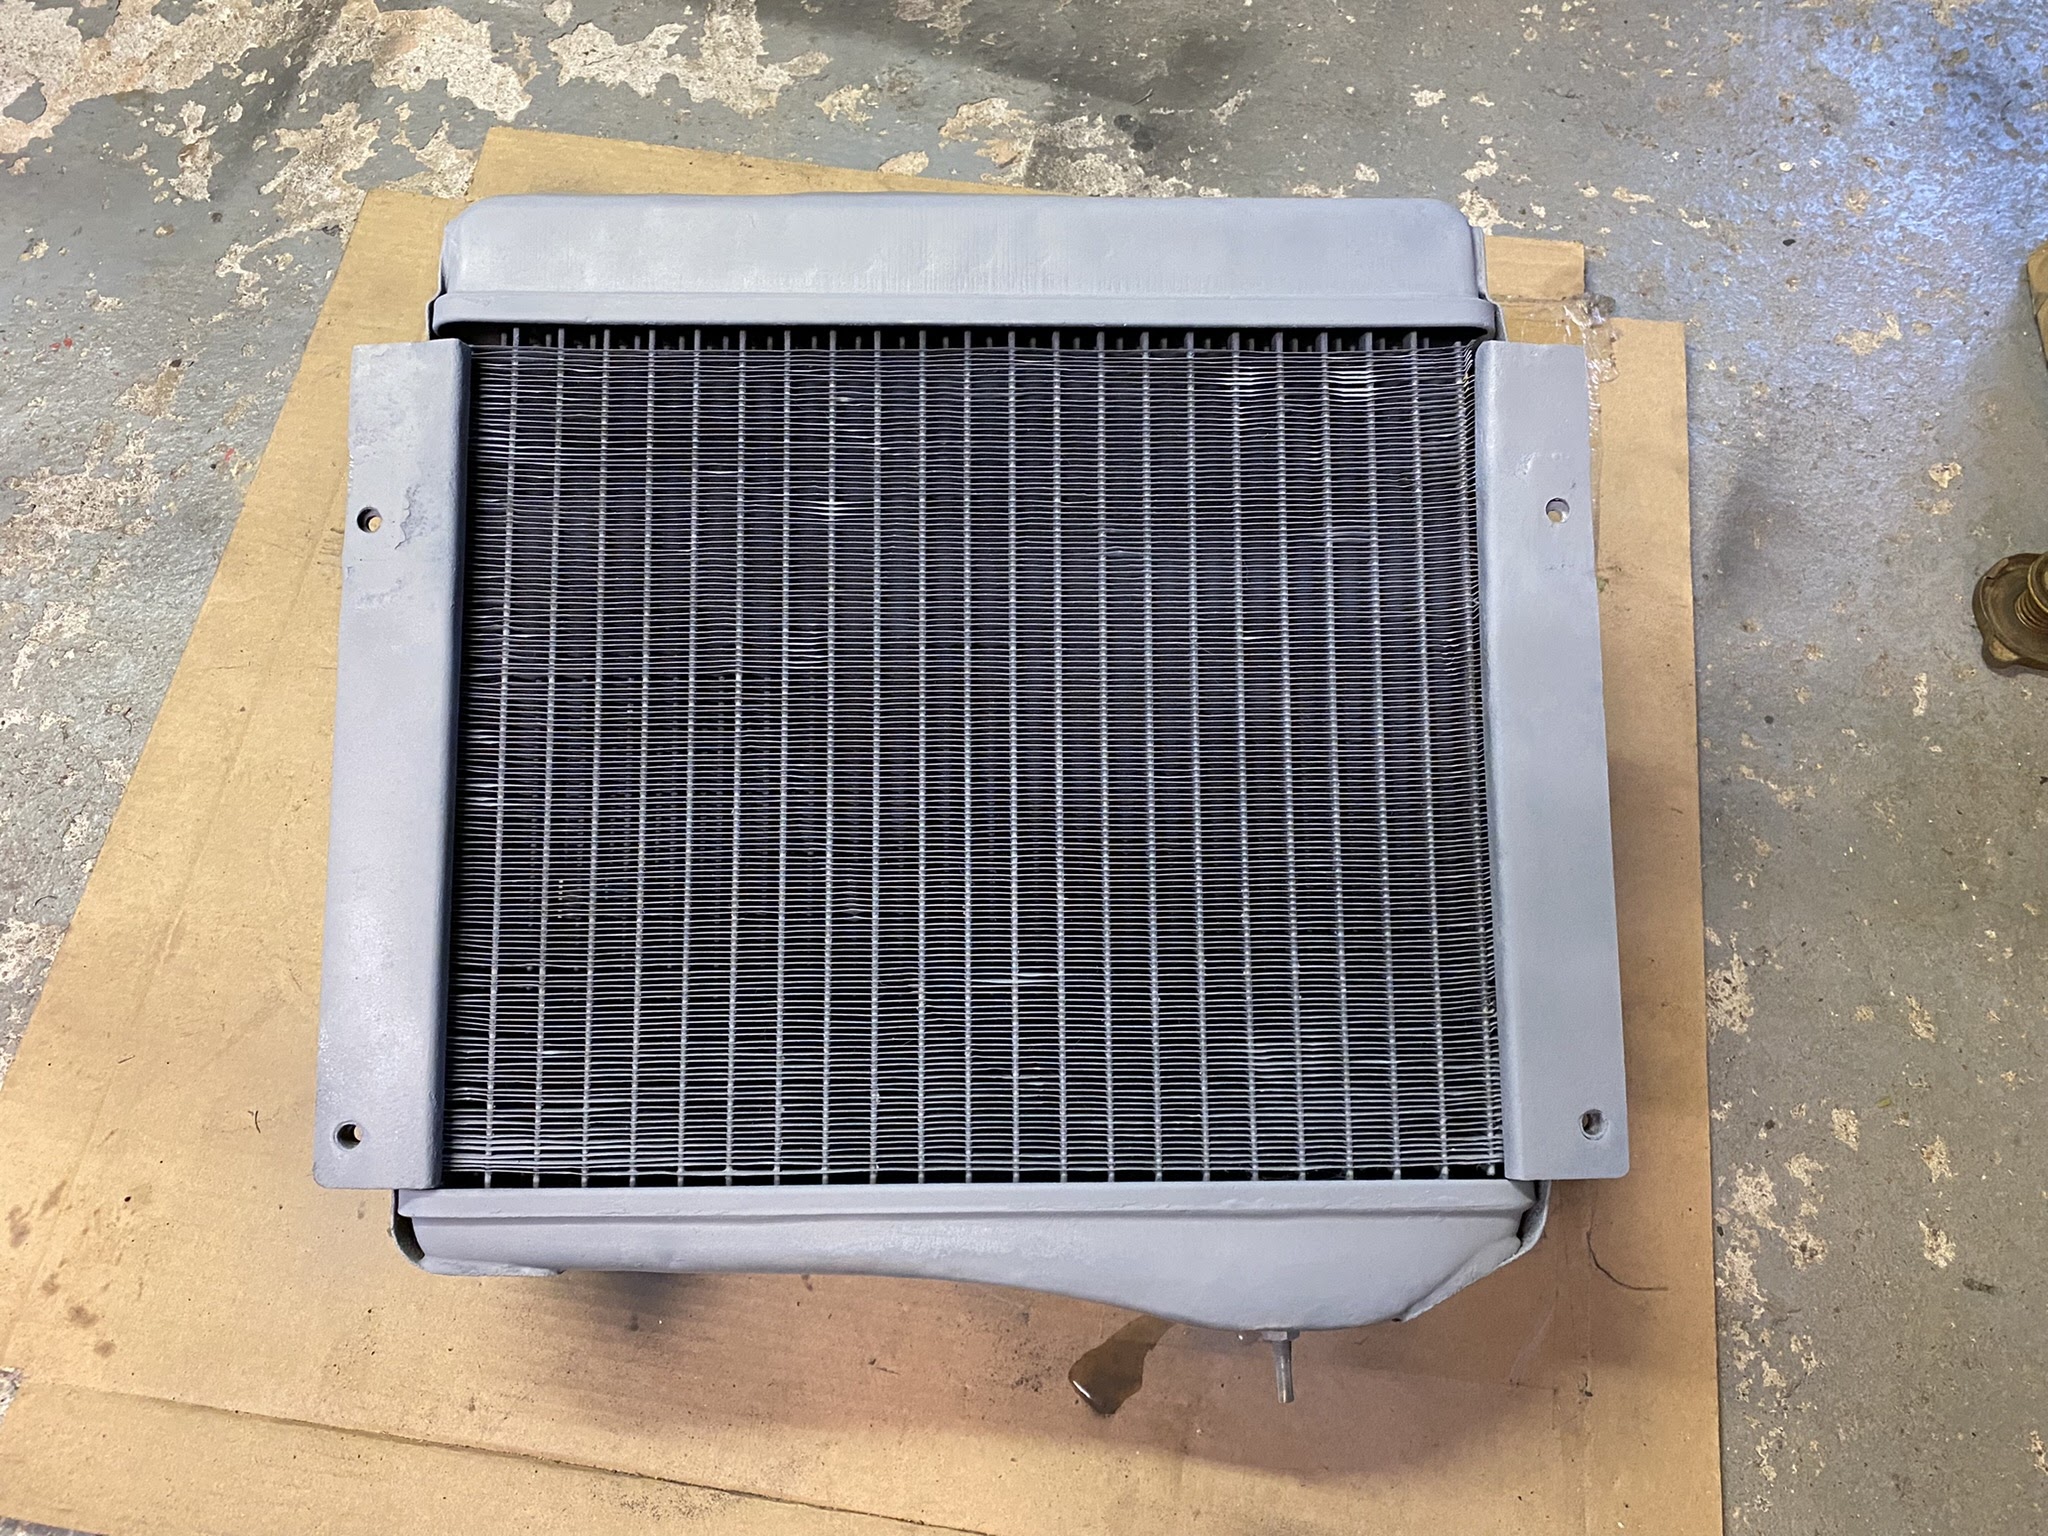
Main part of the cooling system is the radiator. I had no real idea if it worked or not.

There were a few things that on initial inspect were obviously needing attention.

Like these cuts in the shroud which presumably were because the fan was hitting it.


Quite a bit of surface rust.


And some bad repairs that needed returning to how they should be.


Decided to check how the cooling fins were, so with a screw driver carefully straightened what I could and also used my air compressor to blow a lot of air to clean out what dirt and muck I could. Then I put a lamp behind and had a look.


From what I could see there were no blockages, so the next test was to see if it held water at all. So I blocked off the inlet and outlet pipes and filled it up by the garden hose.

Whilst the test did suggest it would hold water, I was not expecting peanuts to come flooding out!!


The radiator was stored in the eves of the garage for a long while and I do remember having a mice problem for a few weeks. I used to leave peanuts out for the birds to eat, but sometimes the squirrels got to the feeder and the nuts went everywhere so I stopped buying them. 

I can only assume the mice joined in the banquet and stored them in a nice dry larder, namely my radiator.

Thing was I just couldn't believe how many eventually came out. Must have been 50 or 60 odd.

So now I needed to finish cleaning it up and repairing the shroud and the mounting bolts.

The trusty wire wheel did a good job on the frame, taking care not to damage the cooling fins.


Welded up the cuts in the shroud the previous owner made as best as I could and bent the whole shroud so it looked a better shape for the fan.


Removed this mess with an angle grinder by cutting out the whole section


Before drilling the new hole I measured the distance on the radiator brackets on the chassis. It was 8 inches from the bottom hole to the top.


Once drilled and double checked it was correct I could then weld the nut retainer in place.


Then double checked from the other side. Looked good.


The two welded bolts at the bottom of the radiator mount seemed ok, until I fitted it properly and found rust had done its damage to the treads, so ended up replacing them as well in a similar fashion. Wasn't impressed I'd missed that and didn't take any photos.

But all being done I could then prime.


and sprayed a few coats of special radiator paint that works at high temperatures.


Ready to fit!

Looks great against the old English white I think.


Starter Motor Refurb

Really didn't want to buy a new starter motor if the old one worked. So decide to fine out.

Took it outside and connected it up to my car's battery with two jumper leads and it jumped into life.

That meant it just needed cleaning up and painting.


It is very simple to take this apart. You just unscrew these two long bolts.


This was in much better condition that the dynamo I restored before.


The four brushes were also in good condition with plenty of life left in them.


Just needed to get down there and clean it all. You can remove this cover to gain easier access to the brushes.


Just some surface rust and dirty that comes off easily enough.


If you do need to replace the brushes you have to undo the main live cable bolt on the end and then pull back each spring to release the brush. There are four so it would get a bit fiddly I'd imagine. But a lot cheaper than buying a new starter motor. 


Used my air compressor to clean this out and remove what dirt I could. Came up well.


Ready for paint.


Can't find another picture of it painted!! Oh well. I like that this shows the date it was made, July 1965.


Well you can sort of see it at the back here! It is best to fit it when the engine is out, but I understand not impossible with the engine in.


Dynamo Refurb

There's plenty of debate about whether to sick with the original dynamos or switch to an alternator.

I can see real benefit of switching and at some point I might. But for me right now I just want to get the car start and drive around on a few short trips whilst I iron out all the issues that I sure will come my way.

Changing the car to a negative earth right now just isn't part of the plan.

That means I couldn't throw this in the bin just yet!


Need to clean this up before I can test if it was even working.


The way to test if this works is to bridge the two connectors on the end of the dynamo with a wire and then connect a volt meter to one of the terminals and the other to the dynamo body and spin it up.

I used my drill pushed into a socket to spin it up and after correctly choosing the right setting (long stupid story!) I got the reading that I was looking for, which was about 14 volts at full drill revolution. About 2000 rpm. 

However the internal parts needed some attention.


So I when about carefully cleaning what I could. The coils are covered in fabric and are really delicate so you must not damage them or the connecting wires which are very small.

Cleaning and painting the outside was much easier...


Until I got to this fan!


Took me ages to get in all the nooks and crannies.


Came up well though.


I decided to replace the brushes and quite cheap and easy to do.


Just gets a bit fiddly sliding the drive back while the brushes are under the tension of the spring.

I cleaned the surface rust off with very fine wet and dry paper and used my compressor to blow any dirty from areas I cannot see or get to. 


All came together well and another bench test proved all was working fine.

Wednesday 28 September 2022

Fuel System Fitting

With the fuel pump rebuilt and working and the engine in it was time to connect up the fuel system so I could get this MG Midget running again for the first time in decades.

Time to fit the fuel tank. Needed to paint it first. I was very lucky as this tank was brand new and given to me when I bought the car by the prior owner.

That meant it just needed a degrease and a coat of primer, followed by a couple of coats of black chassis paint.


But before I could fit the tank you have to fit the fuel gauge sender unit.


And that meant testing it. So I connected my meter up to it to see what readings it produced when I moved the float.

To my surprise and relief it worked! When full a high number...


And when empty a low number.


And somewhere in between!


I did take this apart and give it a good clean before this testing, but it all seemed in good condition.

Now ready to fit the fuel tank to the chassis.


You need to have the fuel pipe and wire to the fuel sender ready.


On the underside of the floor are six bolts welded in that match the holes on the tank.


Fit the wire, rubber mounts and foam seal around the filling hole.


I found it easier to fit the longer rubber mounts to the bolt in the floor.


Then using my trolley jack lifted the tank into position.


And tightened up the nuts.


Next was to fit the filling tube. I bought new rubber seals but the rest was original as was in such good condition.


The lockable fuel cap had a polish and came up very shiny!


Now it was time to fit the fuel pump and pipes. There are only two sections of copper pipe. One runs from next to the carbs, along the length of the chassis back to the fuel pump.

There is only really one tricky section that needs careful bending, which is at the cross-member.


Once at the back it takes a 90 degree upwards turn to meet the fuel pump. The other section of copper pipe loops over the rear axle.

Fitting the pump is a bit tricky if you don't have a ramp. Having to hold the pump whilst fitting the bolts and being upside down isn't ideal. 

You really want to have the nozzles on the fuel pump loose initially so you can move the fuel pipes into the best position possible.


Then you need to also connect the pump power supply, breather pipes that come out into the boot and make sure the copper pipes are all tidy and secure. 

Oh and connect the fuel pipe to the tank!


Right good to fit the carbs!