Wednesday 1 March 2023

Rear Lights

Fitting the rear lights wasn't too challenging compared to the front main lights. The back plates just needed a good clean up and polish.


I really focused on polishing where the bulbs fit so to get maximum light reflection. The rest of this back plate is covered by the out foam gasket.


Once done it was time to fit them on to the car. Need to fit the new foam gaskets first as the old ones were no longer up to the job.


Easy to fit on the back.


Then you can fit on the car by tightening the nuts inside the the rear wing.


It's then simple to fit the bulbs, the outer gasket, lens and chrome rim which clips on at the top and then a long screw holds it all in place.

Looks great!


Monday 27 February 2023

Front Lights

With the panels now all fitted I now needed to start reattaching all the parts to the bodywork, starting with the lights.

Decided to start with the side and indicator lights.


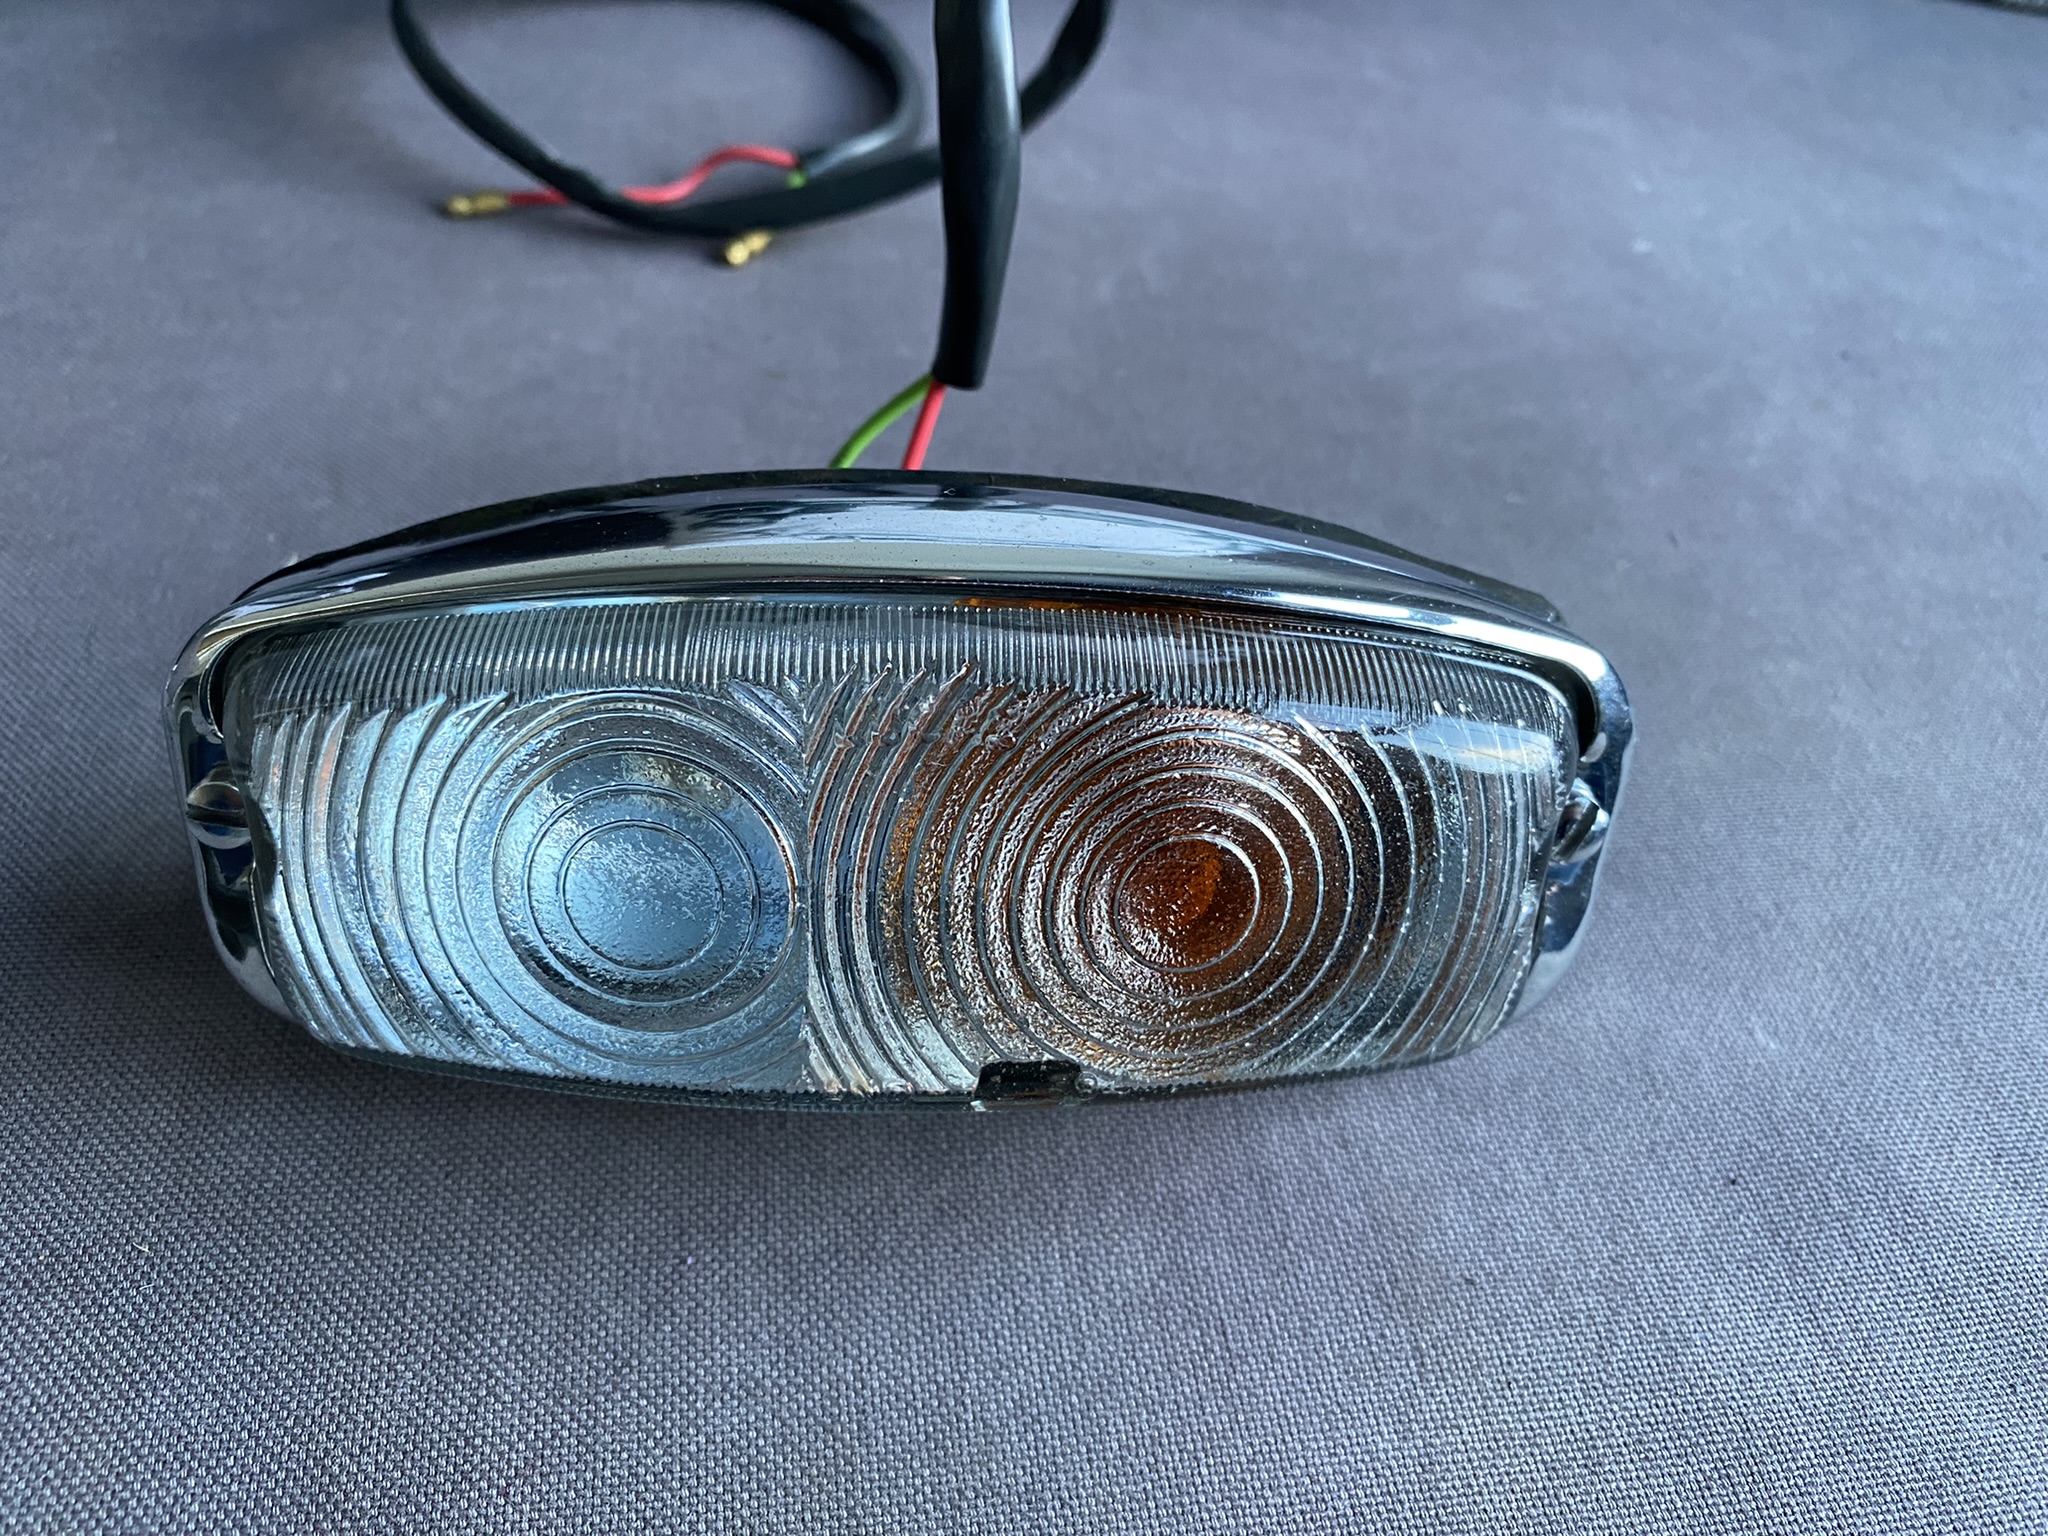
I had to buy new back plates as the old one were totally rusted, but I did keep the original glass lens and chrome.


The new back plate included a new lens but it was much darker and I thought the originals would be better as they should be brighter. 


Fitting the rubber onto the back plate is very easy, but getting the rubber to fit correctly when on the car is a little more tricky.


This is the original chrome surround which cleaned up nicely with very fine wire wool and chrome polish. The mounting screws have a rubber washer to provide support against the glass lens.


The screws also provide as guides that slot into the outer holes in the wing during fixing.


All ready to attach to the car.


As I mentioned before you'll find you need to adjust the rubber surround a bit so that the seal is constant all the way around the glass and chrome to ensure a water tight fit. If possible!


A couple of nuts and washers hold it into place.


You need to thread the wiring through behind the front valance to connect up to the main wiring loom.


Next up is the main lamps.

First you need to line up the bucket and the rubber seal. The adjusting screws are long and so need to line up with the rubber protruding parts on the seal.


You can then start to but all the nuts and bolts in place. However as you tighten them you need to make sure that the rubber seal is even all the way around and doesn't stick out as it is in this photo below. The reason for this is if the rubber seal sticks out too much the chrome surround won't sit flush or evenly against the bodywork. 

I didn't realise this until I'd fitted it and had to take everything off and try again.


Once the bucket is secure you can fit the mounting ring and tightening the adjuster screws to get the correct angle of the lamps.


Both sides now done so time to fit the lamps.


You need to fit the retaining spring which stops the inner mounting ring from moving.


Then you can connect the lamp to the wiring.


Then you need to fit the outer mounting ring.


Which is just a screw and washer.


All looking good, but for some reason which I couldn't work out why the lamp wasn't tight and I could move it a little which I though would make a noise when driving around.


So I cut little bits of insulation foam left over from the heater matrix seal to set behind the lamp at the mounting points.


Once the outer mounting ring was tightened up the extra padding stopped the movement completely.


Fitting the chrome rim would have been straight forward if I had fitted the bucket seal properly. It just needs to be pressed on which can get a bit tight. You just have to keep knocking it with your palm around until it is in place.


Oh and at the same time make sure the screw lines up with the mount. It does get fiddley. 


Looking really nice!

Thursday 16 February 2023

Panel Fitting

Now that the engine was in with, I think everything linked up it was time to fit the panels.


I had hoped that because I had spent so many hours getting all the gaps correct as best I could before it went off to paint this should be fairly straight forward.

First in was the splash guards and front valance.

Initially had a bit of a struggle to get the holes to line up. While access is fairly easy without the wings on it didn't take much longer. Was good to start to add more parts like the rubber grommets for the wiring loom and bonnet release cable. 


and attach the screen wash bottle.


Once both in time to fit the front valance, which bolts on to the front chassis rails.


I bought some black stone chip paint that I wanted to spray on to the inside of the wings before fitting. Have to mask all the edges off to protect the new shiny paint.


Looked like it went on ok with no overspill.


Fits nicely on to the A post and front valance.


I cheated a bit on the doors as the painter didn't remove the hinges from the A post when painting so it was easy to fit the doors with the four bolts top and bottom. Meant there was hardly and adjustments to make.


Fitted the other wing. It was amazing how the panels transforms the car.


Finally to fit the bonnet. The hinges needed to be bolted on which really has to be done before you fit the dash. Also attached the rubber buffers.


Ideally you need 3 people to fit the bonnet. 2 to hold it in place and 1 to tighten the bolts. 

But how nice it looked with all the panels on and the panel gaps still looked good even with a few layers of paint on them.

Monday 9 January 2023

Brake lines and bleeding

 I had to replace all the brake lines on the car. All of them where to badly damaged. 

The new copper lines arrive coiled up and you have to unroll them to something more or less straight if you can. 

You'll also need a pipe bending tool as whilst the copper pipe is easily moveable in your handles, it could buckle and pinch the line which would restrict the flow of brake fluid and the performance of your stopping ability, which isn't recommended.

You will be connecting up the master cylinder.


To the brake light sensor


And then the front and rear flexible brake pipes.


First tip is to make absolutely sure you have the correct pipe for each section. you don't want to be coming up short or having excess. The copper pipes I ordered where the perfect length. I know some like to make up their own pipes.  

I started with the pipe that ran from the brake sensor to the front right. I thought that for a first time at bending this was the simplest to try first.

I found that by offering up the pipe into the rough position and making small bends and adjustments in my hands, worked fine. I then used the bending tool to make the more angled bends. Didn't take that long to have it in position and bolted in place. 


The next pipe was from the master cylinder to the brake sensor. The hardest bit was making the bend where the tightening screw goes into the master cylinder and getting the angle right so you can tighten it up. Access isn't easy on these early models.


The next pipe to fit was from the brake sensor to the front left brake. This was a lot harder due to all the angles and changes in height. I spent so long trying to get it right I forgot to take some photo's of the path I took. But you can see it in the photo below.


You can see the route for the final pipe to connect the system to the rear brakes in the photo below.


It then runs down along the transmission tunnel held into place with two 'P' clips.


You can then connect the flexible pipe to the 'T' junction...


... and the bracket on the rear bulkhead.


Now ready to bleed the brakes! Well in my case after I've fitted the clutch pipe from the master cylinder, which is a right pain due to the lack of space around the clutch cylinder. 


The rules of bleeding the brakes are to fill the master brake cylinder with fluid, ensuring you don't spill any on anything. Have a bottle of water handy in case you spill any, as that's the best to wash it away. Just don't get any water in the brake system if you do spill it!

Starting with the bleed nipple farthest from the master cylinder, which for me is the left rear and then work your way around the brakes to finish on the shortest length, which is my front right.

Basically you have to remove all the air from the pipes and you do that by unscrewing each bleed nipple in turn letting gravity push the fluid down the pipe into the braking system. 

Now there are plenty of videos offering tips on how to bleed brakes the best. You can buy easy bleed systems as well. 


Some suggest needing two people. One operating the brake peddle whilst the other opens and closes the nipple in time with the depression and release of the brake peddle.

Regardless of which method you choose, the main thing is to remove all the air bubbles.

The brake peddle should feel firm and not spongy.

Good luck!