Showing posts with label callipers. Show all posts

Monday, 7 June 2021

Front Brakes Rebuild and Fitting


Having degreased and painted the callipers it was time to rebuild them. You can buy a rebuild set that includes the outer metal housing for the outer seal and the seals. I also needed to replace the pistons as well. I thought it they should fit but I did have a few issues trying to fit the outer metal housing. 

MG Midget Front Brake Callipers rebuild

First job was to fit the outer metal housing and it was this part that caused me the most issues. What I found was that whilst one of the housing's fitted really well the other didn't. I ended up buying another set from another supplier and that fitted just fine, so I assumed it was a bad batch.

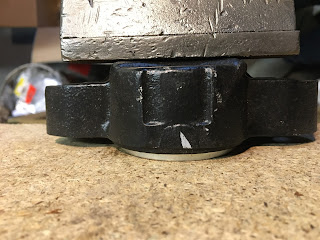
In order to fit the housing without bending it, which is very easy to do as it is very thin metal, you need to press it against a very flat surface. I used a piece of chipboard and my bench vice.

MG Midget Front Brake Callipers rebuild

MG Midget Front Brake Callipers rebuild

MG Midget Front Brake Callipers rebuild

This worked really well for me but you have to make sure that it goes in square. Any damage and you'll need to buy a new one and try again.

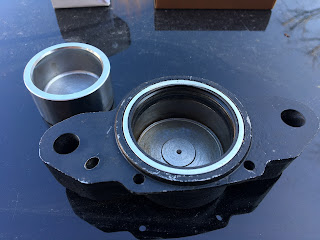
With the housing in place the outer seal slots in nicely.

MG Midget Front Brake Callipers rebuild

Then you can insert the inner seal.

MG Midget Front Brake Callipers rebuild

Once you have completed this four times you are ready to fit the pistons.

MG Midget Front Brake Callipers rebuild

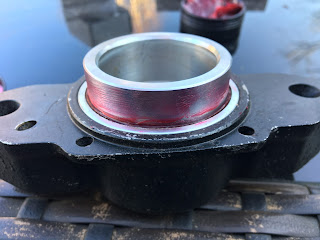
I followed a recommendation to use this type of red rubber grease when fitting the pistons.


You smear it on all the surfaces and then you should find that the pistons slide in with some resistance.

MG Midget Front Brake Callipers rebuild


MG Midget Front Brake Callipers rebuild


I replaced the seal between the two halves as well to help stop any leaks.

MG Midget Front Brake Callipers rebuild

Once all done you can now fit them to the stub axle. These are secured with the two bolts


Checking that the brake disc is central in the groove you can fit the pads. The new pads I bought have a anti vibration pad at the back of the pad that is pressed by the piston. You can buy anti-squeal shims which need to be lubricated with copper grease.


Once in place you can fit the spring clip and split pins.


Then you can fit the bleed nipple and blanking plug. Make sure the bleed nipple goes on the top so that air comes out easily when bleeding the brakes.


Then you are all set to connect this up to the braking system.

MG Midget Front Brake Callipers rebuild

Sunday, 8 November 2020

Brake Callipers

Thought I would share my process of restoring the front brake callipers.

Both callipers were in a bit of a state, so I was unsure of how they would come up.


Fairly sure they were both ceased.


Only one way to find out and that is to take it apart. First off remove and inspect the brake pipes. Both were cracked and need to be replaced.


Need to be careful with this oil, not very nice stuff.


With the callipers secured in the vice remove the two pins.

Then remove the spring clip


The brake pads and anti-squeal shim can now be removed. Both of mine need to be replaced.


Now on to the tricky bit. Removing the pistons. If like me your callipers are not attached to the car then you'll need some way of getting the pistons out with damaging them. If like mine they are ceased and stuck fast then what I did might also work for you.


Mine were stuck fast and on reading on the internet others had suggested using compressed air to force the pistons out. Fortunately I have a small compressor, but you could always ask your local garage. There is a small rubber washer shown in the top left of the photo above that needs to be replaced as well. This seals the joint between both halves of the calliper.

I reconnected the pipe and connected that to my air hose and then turned on the flow. Nothing happened. It took a lot of heat, penetrating fluid and some gentle tapping with a hammer to get them moving. But once they did they shifted very quickly. I used a larger screwdriver to stop them coming out completely as I could only get one moving at a time.


Once removed you can see how badly the corrosion had affected the rubber seals. Fortunately these are replaceable.


First off you need to remove the outer rubber seal


Then the inner rubber seal, which wasn't in bad condition. But may as well replace.


This left the metal housing for the outer seal. This requires just a gentle tap with a screwdriver around the top rim to ease it away the it come off.


Just the clean up left!


That'll do!


Next a degrease and a coat of primer and chassis black. As with all these main parts there are usually plenty of smaller parts that also need inspecting and cleaning or replacing.