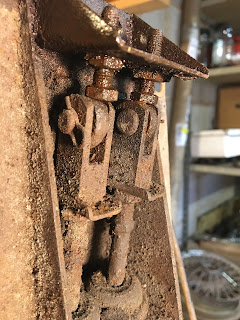
The master brake cylinder and and pedal box was in a right state!
Start by removing the springs. Please note they should be the same! Need to order some new ones I think.
Then remove the wire clips that hold the clevis pins in place.
Remove the clevis pins themselves
Turn the pedal box over and undo the nut holding the pedals in place.
You might be able to see the remains of the draft excluder in the bottom of the slots. Need a new one of those whilst I'm at it!
These need a good once over with the wire brush wheel and new pedal rubbers to add to the shopping basket.
Then remove the two bolts holding in the master cylinder to the pedal box.
Master cylinder should come out without too much fuss.
Needs some serious attention, but nothing I haven't tackled before and no welding required!
The cylinder itself all seems in once piece. It is a very solid part.
Best to remove the adjustment screws for cleaning.
The pedal box looked solid so gave it a good going over with the wire brush wheels.
Came up really well under all that grime and rust.
A little bit of surface pitting from the rust, but not enough to worry about.
I gave it a couple of coats of rust converter and left it ready for black chassis paint.
Time to take the master cylinder apart for inspection.
Not much of the gasket left!
What did remain needed to be carefully removed so I used a flat razor blade.
Then on to the chambers
The pistons themselves were stuck in there so I used the push rod to wiggle them around and eventually they did come out.
That is some dirty sludge! I'll need to buy a new set of seals and shims before I can put this back together.
This is the order they go in. You'll notice the white spacer which goes against the brake side. I guess it helps make sure the brake goes back quickly after you remove you foot from the peddle.
Time to inspect the chamber and I suppose unsurprisingly the surface was damaged.
I have read that some people have used a honing tool to skim the surface to remove these holes. For me I didn't like the idea of that so sent mine away to Past Parts who did an amazing job!
I only asked them to re-bore the cylinders with new stainless steel liners but they cleaned and oiled it as well for me. Highly recommended.
So then I just had to finish cleaning the pedals and paint.
Time to put it all back together! After cleaning I repainted these to protect them from further rust.
Cap could do with a clean.
New draft excluder in place.
Definitely needed a new pedal bolt!
Don't forget the spacer between the pedals.
Make sure you use the short bolt on the underside to hold the master cylinder to the pedal box. The other one is too long and it won't fit in the chassis.
Still waiting for new springs....
New foam surround.
Very pleased how this has come out and looks so good with the pedal rubbers.


